Note: Some links in this post contain affiliate links, which means I may receive a commission if you make a purchase. That’s actually one of the ways you make money blogging! Thanks for supporting my blogging dreams! 🙂
If want to become a serious blogger, you’re going to have to set your website up on your own hosting. Why you may ask?
- You can’t put ads on your blog without permission from the parent site – And sometimes you can’t put ads on your site at all. With WordPress.com, you can only put ads on your site after 25,000 monthly page views and then after that you may still be required to split the profits.
- You don’t own your site – That’s not your site, it’s WordPress.com/Squarespace/Weebly’s site. WordPress.com can (and will) put ads on your site unless you pay an additional fee just so that they won’t put ads on your site.
- Limited amount of plugins – You cannot download all the amazing plugins on WordPress.com like you can when you have a self-hosted site. From what I hear from my readers, you can’t even download Google Analytics without being charged an additional fee. There are probably thousands of plugins available on the WordPress store and WordPress.com only allows you to use a handful of them.
- They charge you for everything – It seems that if you want to do anything extra, WordPress.com will charge you for it. Now on the flip side, if you don’t know what you’re doing with a self-hosted WordPress, your developer/website assistant will charge you for everything too! That’s why you should really take some time to learn how to use WordPress. Yes, it is really difficult to learn in the beginning, but it saves you so much money in the end!
All in all I believe that WordPress.com and sites like it are perfect for beginners just wanting to get their start, but if you plan on being a serious blogger in 2017 with a goal of making money, you should definitely sign up for a self-hosted site.
-
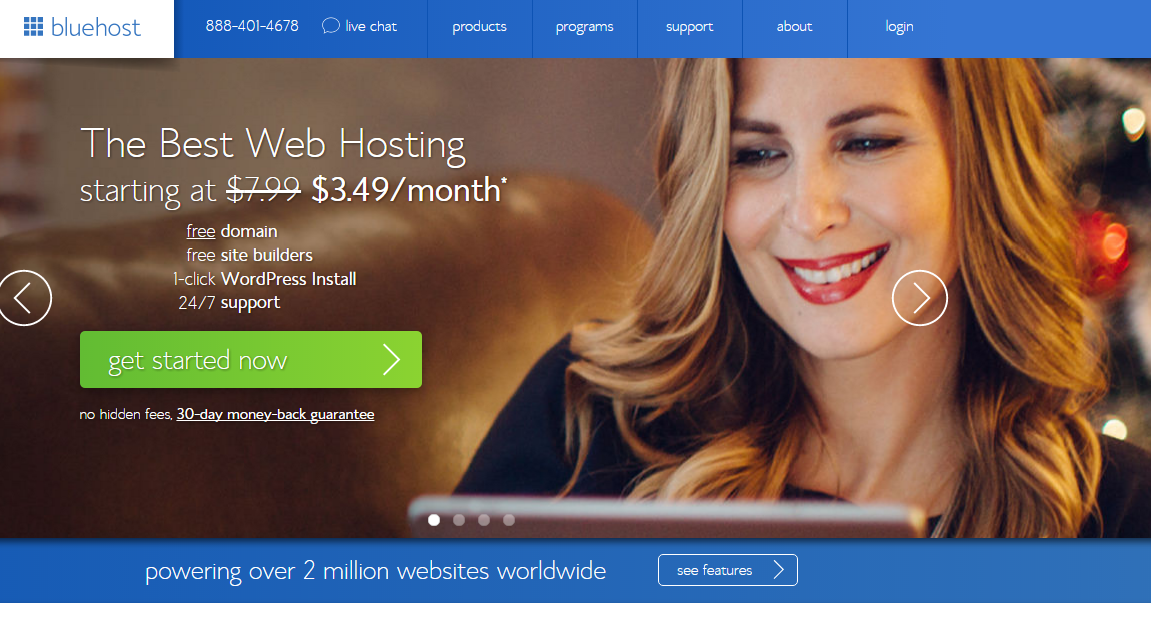
Go to bluehost and select get started now.
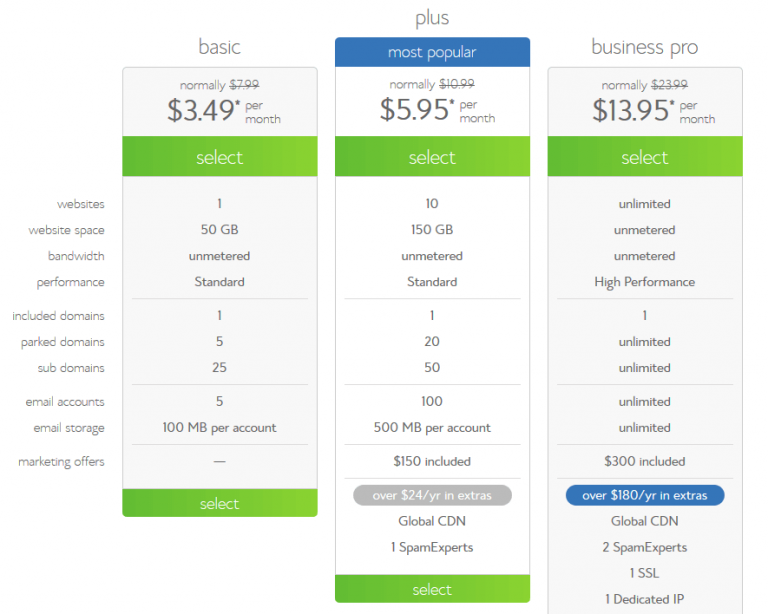
2. Select your plan. I would suggest the basic plan. If you’re a beginner, that’s all you need.
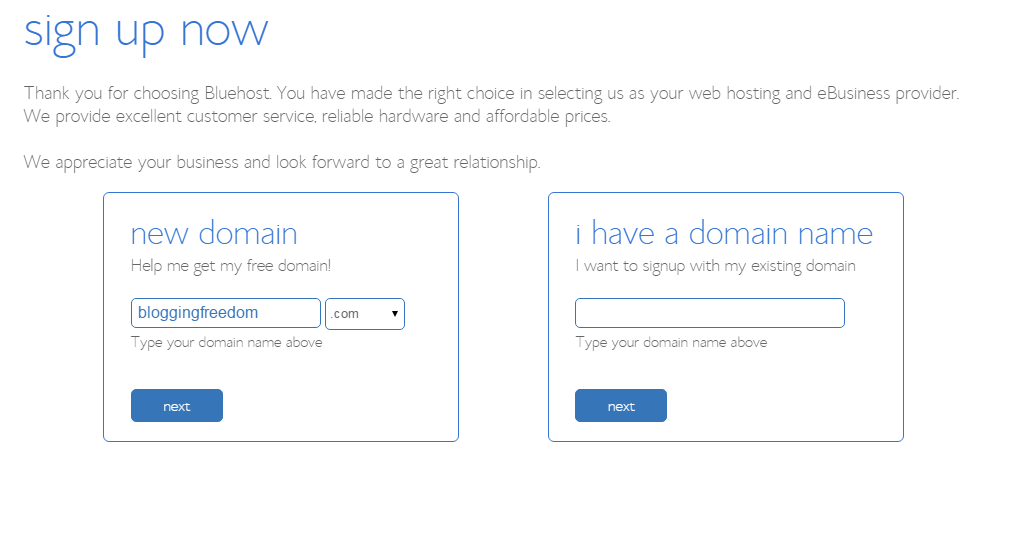
3. Next you will select your domain (website name) by typing it in the “new domain” box above. If you already bought a domain, you input that name in the 2nd box. (Later you’ll have to direct your domain to the new hosting)
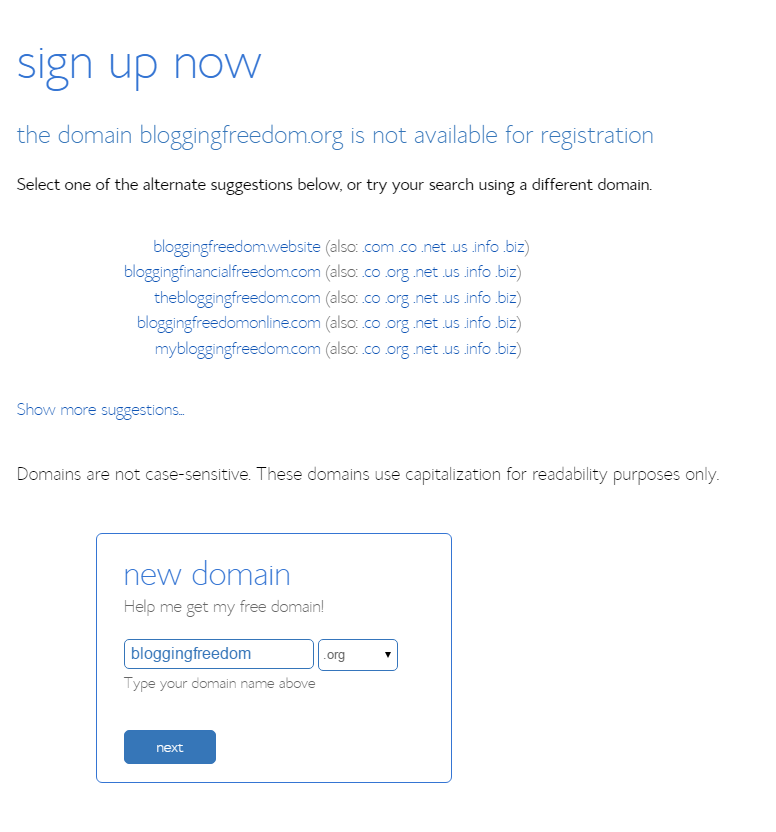 4. If the domain name is already taken, this screen will pop up with alternatives that you can select.
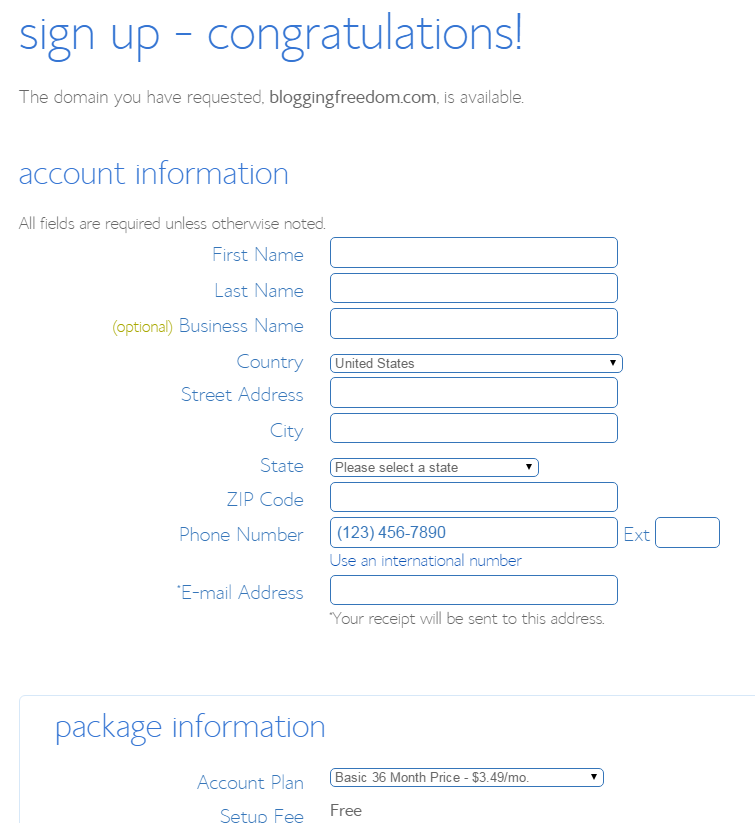
5. Once you find a suitable domain name, you’ll be brought to this screen where you just complete your account information.
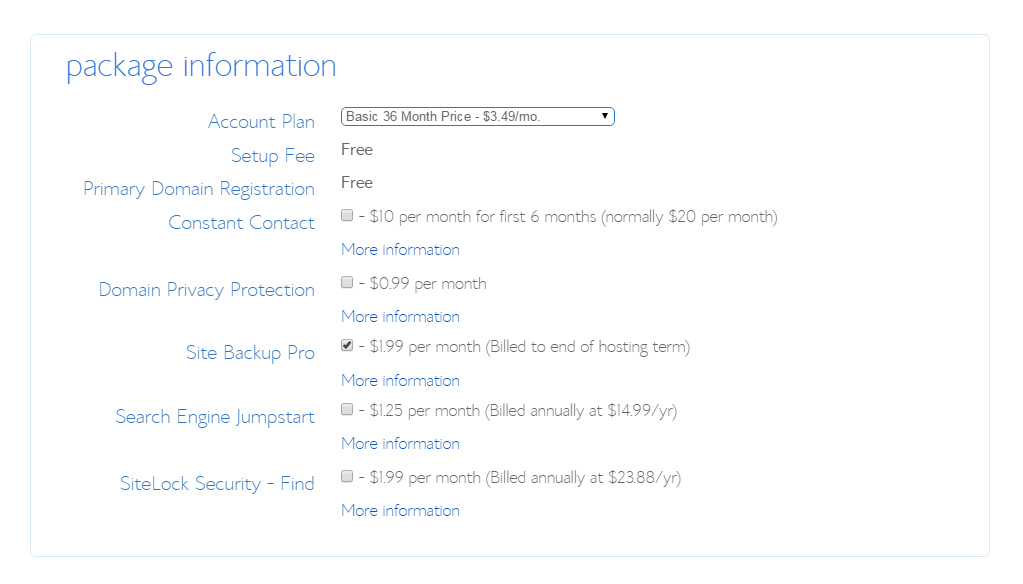
6. Once you scroll to the bottom, you’ll have to select your package. The more months you buy in advance, the cheaper it is. And yes, you do have to pay at least 12 months in advance. I always pick one year just because I don’t feel comfortable committing to a hosting site for 3 years, but if you want to save money, then that is the best choice. You can also select the extras like 6 months of constant contact (email autoresponder) half off. That’s actually a pretty good price since most email autoresponders charge $20 per month. The site backup pro is 1.99 per month and seems like a pretty good investment since your website can just magically go down at any time and if you don’t have it saved somewhere, you’ll have to start all over from scratch (happened to me a month ago : ( ) Or you can just use Dropbox for WordPress (plugin when you download WordPress on your bluehost hosting) and back your website up for free.
7. Once your account is set up, go to the login page and login.
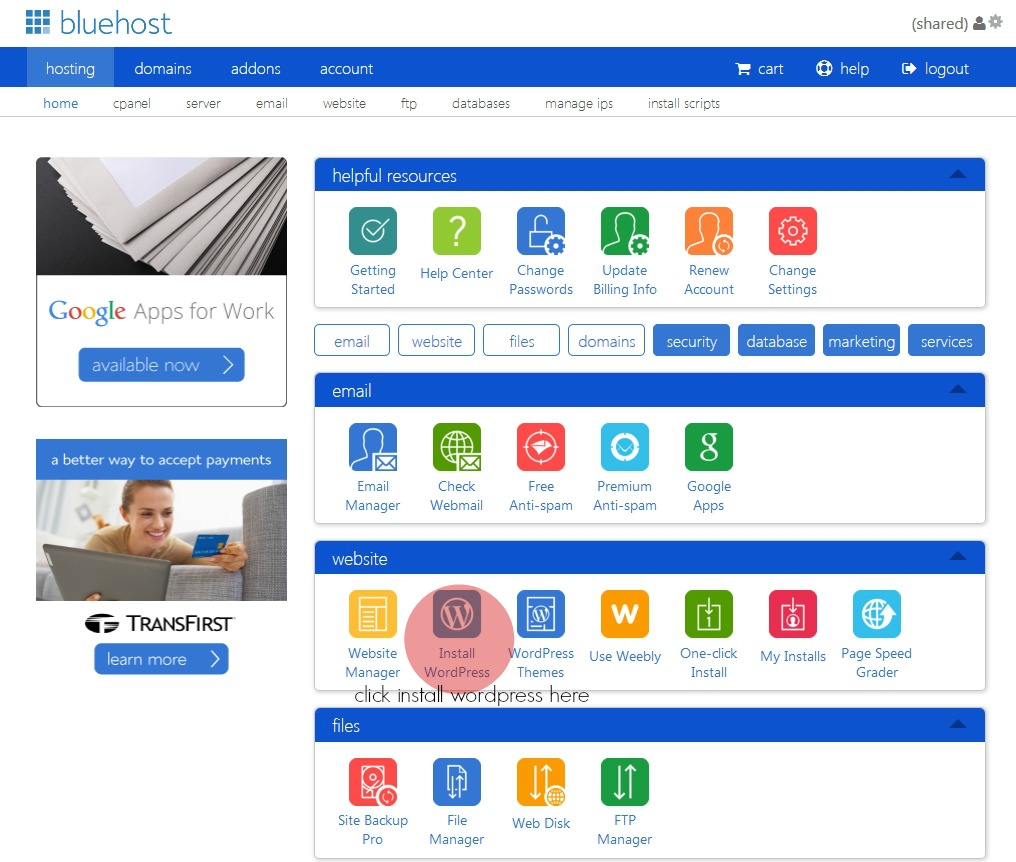
8. Now that you’ve logged in, you’ll be taken to your account control panel. This is where you’ll be able to control all aspects of your hosting. To install WordPress click “Install WordPress” under the website section.
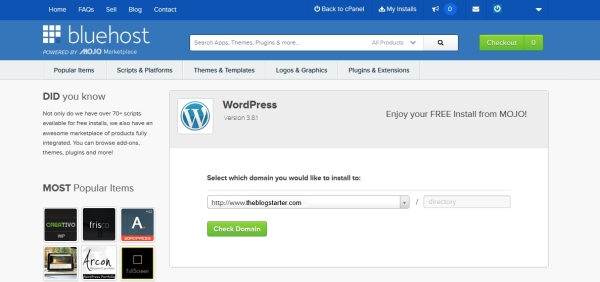
9. You’ll be taken to the MOJO marketplace where you will select “install”.
10. Next, select the domain you bought earlier to install on your WordPress site.
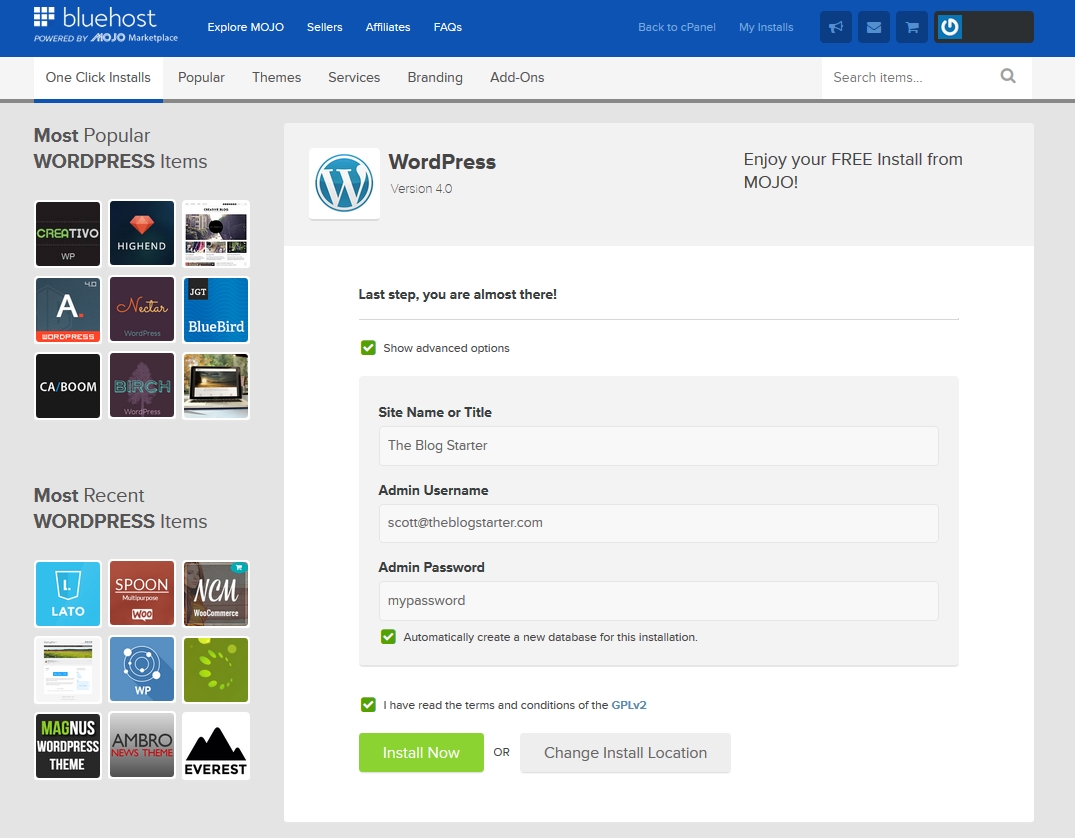
11. Set up your site’s name and your admin credentials. Then click “Install Now”.
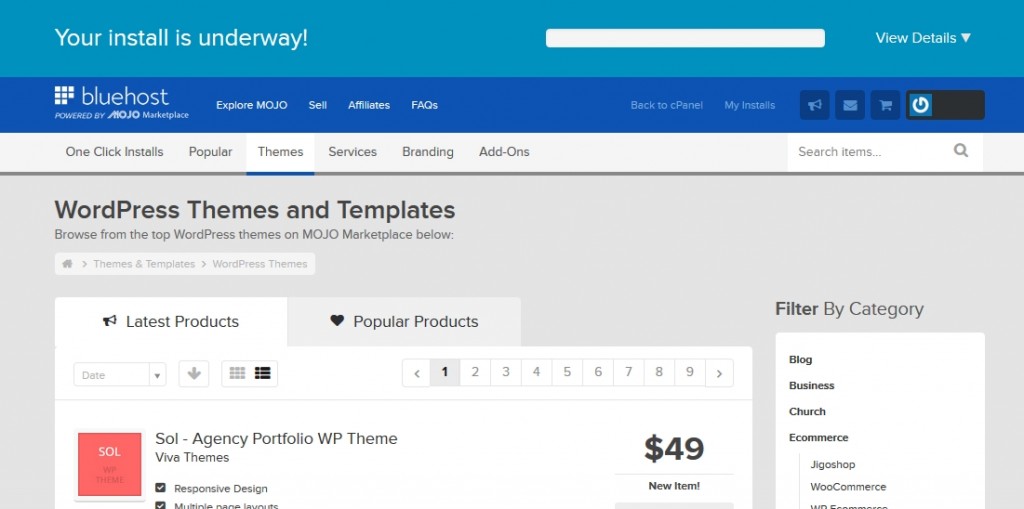
12. You’ll be taken to this screen while your website is being installed.
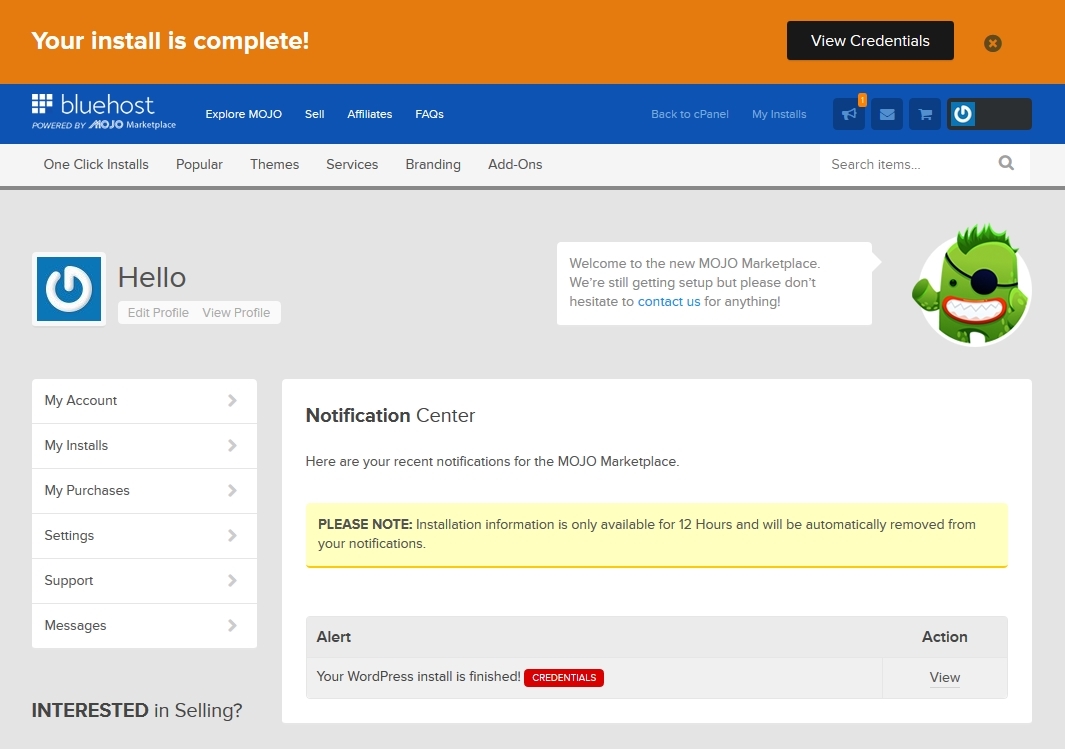
13. Now your website is officially installed. Select “view credentials” at the top to see your login credentials. You will also be emailed your login credentials.
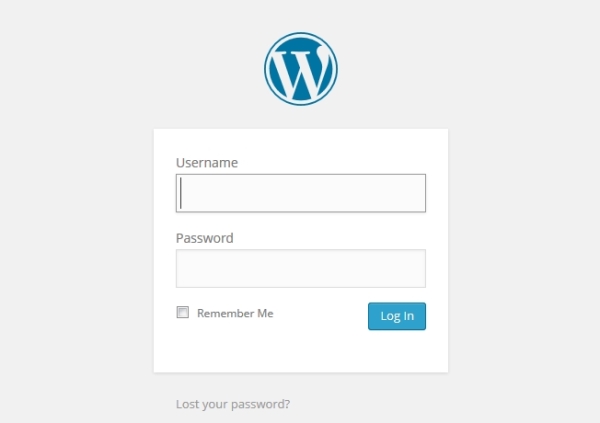
14. To log into your WordPress website go to http://www.yoursite’sname.com/wp-admin
Ta Da!! You’ve now set up your WordPress on self-hosting. If you would like for me to install your website for free, just fill out your details here and we can get started.
Please Pin Me 🙂

13 Comments on How to Start a Website in 20 Minutes or Less – Setting Up A Website on Bluehost Hosting
1Pingbacks & Trackbacks on How to Start a Website in 20 Minutes or Less – Setting Up A Website on Bluehost Hosting
-
[…] How to Start a Website in 20 Minutes or Less – Setting Up A Website on Bluehost Hosting […]




Tess
December 29, 2015 at 4:19 pm (9 years ago)I’m looking to switch from wordpress.com to self hosted with wordpress.org this week. Great read! I’ll be pinning this for later 🙂
proassistblog
December 29, 2015 at 7:04 pm (9 years ago)Thanks for reading!
Linda Hobden
December 31, 2015 at 5:03 pm (9 years ago)I did self hosting from the start of my blog back in 2012 – I use evohosting though and have been pretty happy with them.
proassistblog
December 31, 2015 at 5:04 pm (9 years ago)That’s awesome!!
Julie
December 31, 2015 at 5:45 pm (9 years ago)Excellent information, and I really appreciate the step-by-step directions!
proassistblog
January 2, 2016 at 2:09 am (9 years ago)Aw thanks! I’m glad you found it useful!
Kayla
December 31, 2015 at 7:10 pm (9 years ago)This is just what I needed!!! I’m planning on moving from wordpress.com to a new hosting site this year!! Will have this bookmarked!! thanks, Manda! 🙂
proassistblog
January 2, 2016 at 2:08 am (9 years ago)I’m glad it has helped you!! Thanks for commenting.
Rose F
January 6, 2016 at 7:48 pm (9 years ago)Shared for you!
proassistblog
January 6, 2016 at 8:22 pm (9 years ago)Thank you Rose! You are AWESOME!
Hiep
October 6, 2017 at 2:03 am (7 years ago)Thank you Amanda !
proassistblog
October 6, 2017 at 8:53 pm (7 years ago)You’re welcome!